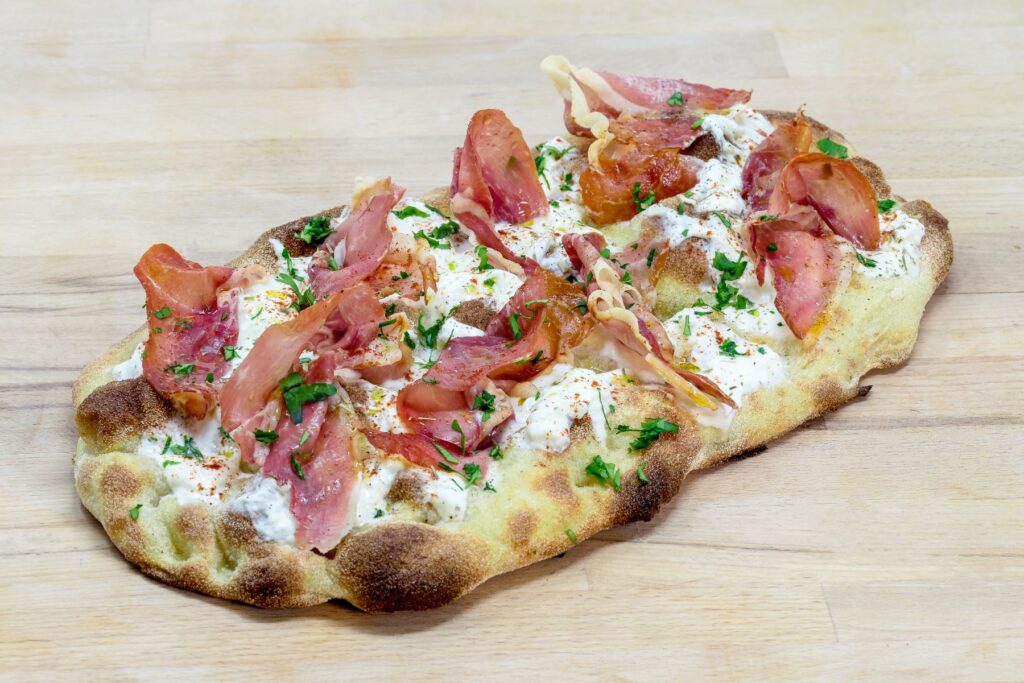
Pinsa is conquering the palate of consumers, both in Italy and abroad. In recent years, more and more people are allowing themselves to be tempted by this very traditional dish, considering it a delicious and unique alternative to pizza.
But what makes pinsa romana so special? Aside from its oval shape, it is its soft, crispy and light texture that makes it stand out immediately from pizza, and it is usually thinner, crispier and less dense than focaccia. This is achieved thanks to the flour mix, to the dough high hydration and special processing, as its long rising time contributes to its distinctive flavour.
How to make pinsa romana at home: the tools of the trade
Many people wonder how to make pinsa at home. A legitimate question, given that the product is still associated with the catering industry, and therefore with an evening in a pizzeria or pinseria. It is also possible to make an excellent pinsa at home from scratch from the flour mix, but this is clearly an option dedicated to the enthusiasts.
Nuvola was created with the intention of broadening the access to pinsa, as it is within everyone’s reach, can be purchased close to home and prepared in just a few minutes. But the most interesting aspect, from the consumer’s point of view, is its quality: the product, in fact, follows the rules of the tradition meticulously and it is completely handmade (LINK Art.), prepared by Di Marco’s pinsaioli, who roll out each base individually.
Buying a pre-cooked Nuvola means you can dismiss issues such as flours, dough, hydration and leavening, since the product was created to combine taste and speed of preparation. All you have to do is unleash your creativity, buy quality ingredients and focus on the only step of the process that has to be carried out at home: baking.
Tips for perfect baking
We have already explained that Nuvola is meant to be an excellent product, just like the bases handmade in pizzerias and pinserie from scratch from the flour mix.
Between the two situations, however, there is a significant difference: the oven. To put it simply, restaurant ovens can exceed 400 °C, a temperature that cannot be reached with traditional domestic ovens, which usually get to 250 °C. Take this with a grain of salt, as some modern ovens offer features such as pizza mode that can exceed 300°C. One can however consider 250°C as a standard maximum threshold for home ovens. To answer the question ‘how to make pinsa at home’, this limit must be considered.
To overcome this obstacle, some cooking enthusiasts purchase small professional ovens, which in addition to reaching 300/350°C, offer independent regulation of the two areas of the oven, traditionally known as the ceiling and floor. In this case, the pinsa is baked directly on the oven floor, i.e. on the stone. The heat from both the top and the bottom ensures even baking and, above all, the typical crispness of the base, which is one of the elements that makes pinsa stand out. If you can set the two temperatures independently, we recommend 300°C for the floor and 320°C for the ceiling: in this case, Nuvola should cook perfectly in 3 minutes, although the exact time depends very much on the moisture of the chosen topping.
Most consumers have the typical 250°C domestic oven at home. How can you make up for this limitation? This is not a real obstacle to the quality or success of the dish, there is a trick that allows you to achieve results similar to those of professional ovens: we can in fact use a classic baking tray, turn it upside down and leave it inside the oven while you preheat it. By doing so, the baking tray reaches a very high temperature and can play a similar role to the stone in professional ovens. Nuvola, once seasoned, can be carefully slid onto the baking tray and baked for a variable time depending on temperature and toppings, but usually around 5 minutes at 250°C. We recommend to use a ventilated oven.
Cocción de la Pinsa en el horno: preguntas frecuentes
¿A qué temperatura se cocina la Pinsa en un horno doméstico?
En un horno doméstico, la Pinsa puede cocinarse a 250 °C, una temperatura que alcanza la mayoría de los hornos. Es importante precalentar bien el horno antes de introducirla y, si es posible, dejar dentro también la bandeja invertida o la piedra refractaria que se utilizará como superficie de cocción.
¿Cuánto tiempo debe cocinarse la Pinsa en el horno?
A 250 °C, unos 5 minutos suelen ser suficientes. Sin embargo, el tiempo de cocción puede variar en función del horno y, sobre todo, de los ingredientes utilizados: los toppings especialmente húmedos pueden requerir unos minutos más.
¿Es mejor cocinar la Pinsa con horno estático o ventilado?
Siempre que sea posible, el horno ventilado es una buena opción, ya que favorece una distribución uniforme del calor y ayuda a conseguir una base crujiente. La Pinsa también puede cocinarse perfectamente en un horno estático, prestando especial atención al precalentamiento.
¿Dónde debe colocarse la Pinsa dentro del horno?
Para favorecer una buena cocción de la base, es recomendable colocar la Pinsa sobre una superficie que ya esté muy caliente. En un horno doméstico puede utilizarse una bandeja precalentada colocada al revés o una piedra refractaria.
¿Hay que precalentar el horno antes de cocinar la Pinsa?
Sí. El horno debe alcanzar la temperatura prevista antes de introducir la Pinsa. El precalentamiento es especialmente importante cuando se utiliza una bandeja invertida o una piedra refractaria, ya que deben acumular suficiente calor para cocinar rápidamente la parte inferior de la base.
¿La Pinsa debe cocinarse directamente sobre la rejilla del horno?
Es preferible utilizar una bandeja muy caliente o una piedra refractaria. De este modo, la parte inferior recibe calor de inmediato y puede quedar más crujiente, acercándose al resultado que se obtiene en un horno profesional.
¿Se puede cocinar la Pinsa sobre una piedra refractaria?
Sí. La piedra refractaria es especialmente adecuada para cocinar Pinsa porque acumula calor durante el precalentamiento y lo transmite rápidamente a la base. Debe calentarse previamente dentro del horno y, después, la Pinsa puede colocarse directamente sobre su superficie.
¿Cómo evitar que la Pinsa quede blanda por debajo?
El primer consejo es precalentar muy bien la superficie de cocción. Un topping demasiado húmedo también puede dificultar que la base quede crujiente, por lo que conviene evitar cantidades excesivas de ingredientes que liberen mucha agua durante la cocción.
¿Se puede poner la mozzarella sobre la Pinsa antes de hornearla?
Sí, pero hay que tener en cuenta la cantidad de agua que libera la mozzarella. Si está especialmente húmeda, es preferible escurrirla bien antes de utilizarla para evitar que la base se humedezca y pierda su textura crujiente.
¿Cómo se cocina la Pinsa en un horno que supera los 300 °C?
Con un pequeño horno profesional o un horno doméstico de alta temperatura, la cocción puede ser más rápida. Con la parte inferior a unos 300 °C y la superior a unos 320 °C, la Pinsa Di Marco puede cocinarse en aproximadamente 3 minutos, ajustando siempre el tiempo en función de los ingredientes.
Finally, there is a further possibility to achieve perfect baking, and that is to buy a refractory stone and proceed as described above, but in this case without flipping the baking tray. Basically, the stone should be placed inside the tray during preheating and not on top. In this case, you need to cook Pinsa Di Marco directly on the stone.